Set Up Visual Studio Code for C and C++ Development
VS Code is the most popular IDE to date today. It is the most flexible IDE with tons of customizable features. It is one of the most versatile development envrionments out today and can be configured and used with any other programming languages out there.
C++ is one of the most powerful programming languages out there. It is used to write computer programs ranging from simple Hello, World console applications to major operating systems and cloud infrastucture code. There are numerous programming languages itself that are built into C & C++ eg. Python, PHP etc. So learning C++ will build the concepts to work with any and every programming languages there are.
There are various online and offline IDEs for writing C or C++ code but a reliable code editor is important to have an efficient coding experience. In this post, you'll learn how to setup VS Code for writing C/C++ Code. There are other popular IDE's you can use such as CodeBlocks IDE. It simple and easy to use, has quite a lot many features and suitable for day to day C/C++ coding. Now for those who want C/C++ experience in VS Code IDE.
Prerequisites
In order to successfully complete the setup process we must exactly need follow the steps. Take a look below.
- Setting Up VS Code
- Installing the Mingw-64 (C/C++ Compiler)
- Updating PATH Variables
- Conclusion
Please note that the set up process is explained over the Windows (64bit) Operating system. The guide is though equally well applicable for other OSs such as Linux or Mac. The configuration process may slightly differ, such as adding information to PATH variables and so.
Setting Up VS Code
VS Code is all you know is powerful, flexible and multi-platform code editor. We are going to use it as our C/C++ IDE so a little configurations would be required. So first of all Download VS Code from the official website and follow the installation process. A few clicks would get you up and running with visual studio code.

Installing Extensions
After you've successfully installed VS Code, we'd need to add a few extension to enhance C/C++ suppport in VS Code. First we'll install the C/C++ for Visual Studio Code extension that adds extra enhancement and support for C/C++ development. Click open the Extension Manager on the VS Code sidebar or use the shortcut Ctrl+Shift+X. Now search for the extension C/C++ for Visual Studio Code and install it.

Install Code Runner
Now, again search the package manager and this time look for an extension named Code Runner and install it. This extension will help you run C/C++ code with a click of a button .

Setup C/C++ Compiler
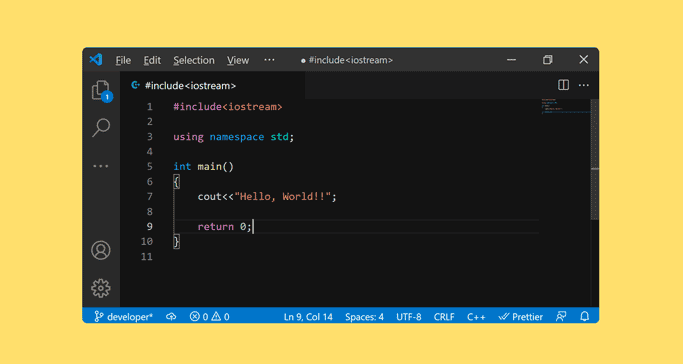
Now, if you have successfully installed the VS Code IDE, it's now time to install the GCC C++ Compiler and GDB debugger from Mingw-x64 as we'll use this complier with our VS Code IDE to create programs that runs on the Windows Operating System. Once, we complete the entire setup, we'll test it by building a basic Hello, World!! program in C++.
Visit MSYS.org and Download the MSYS2 installer. MSYS2 is a collection of tools we can use to build, install and run windows applications. After we install the tools, we'll be downoading the C++ compiler using the package manager called Pacman which is the part of the tools we install. Lets follow. Once you download the installer and run it you'll see a dialog as shown below.

Now, when you click next it will ask you to select a default installation directory. You can leave the one default that is C:\msys64 and proceed further.

Click next and Let the installation process continue further.

Once the installation is complete you should see a screen like below (if you selected "Run MSYS2 now") or you may click on the Start button and search for MSYS2 MinGW x64 and launch it.

It's now time to run some commands, first we'd sync the package repository of the package manager Pacman we talked about earlier. Then we'll fetch and install the requisite tools required for our development environment. Copy the command below write it or paste it by right clicking on the dark window that you see.
pacman -SyuYou'll see that the package manager starts syncing the repository.

Now you may update rest of the base packages by running the following commands again in the same terminal.
pacman -SuOnce these steps are complete, we're now ready to install the final package that is our MinGW GCC Compiler. Run the following command on the same terminal.
pacman -S --needed base-devel mingw-w64-x86_64-toolchainAfter a few seconds it will show you the package size and ask you to continue further with the installation by pressing "y "

After a few minutes, the installation process for the compiler will be finished and if you now browse the C:\msys64\mingw64\bin directory, you'll be able to see the compiler and related tools and that's it for this part.

Updating PATH Variables
Now that we've installed the compiler and related tools with it, it is important to add their directory to the system's PATH Variable so that we can access the compiler right from our terminal. You can follow the steps below to add the path to your Mingw-w64 bin folder to the Windows PATH environment variable.
- Type "Settings" in the Windows search bar to open your Windows Settings.
- Search for Edit environment variables for your account.
- Choose the Path variable in User variables and then select Edit.
- Select New and add the Mingw-w64 destination folder path to the system path which by default is C:\msys64\mingw64\bin.
- Select OK to save the updated PATH.

Now, after updating the path variable and if you open a console, CMD and type gcc --version, you'd see something like this

Please make sure to restart VS Code or any other console window for PATH update to take place.
Conclusion
Now that we have successfully completed the set up process for C/C++ Development environment on VS Code, we can now create and run C/C++ programs right through VS Code IDE. It's now time to test the setup and there's no better way than writing a Hello World! program. Follow the tutorial below.